


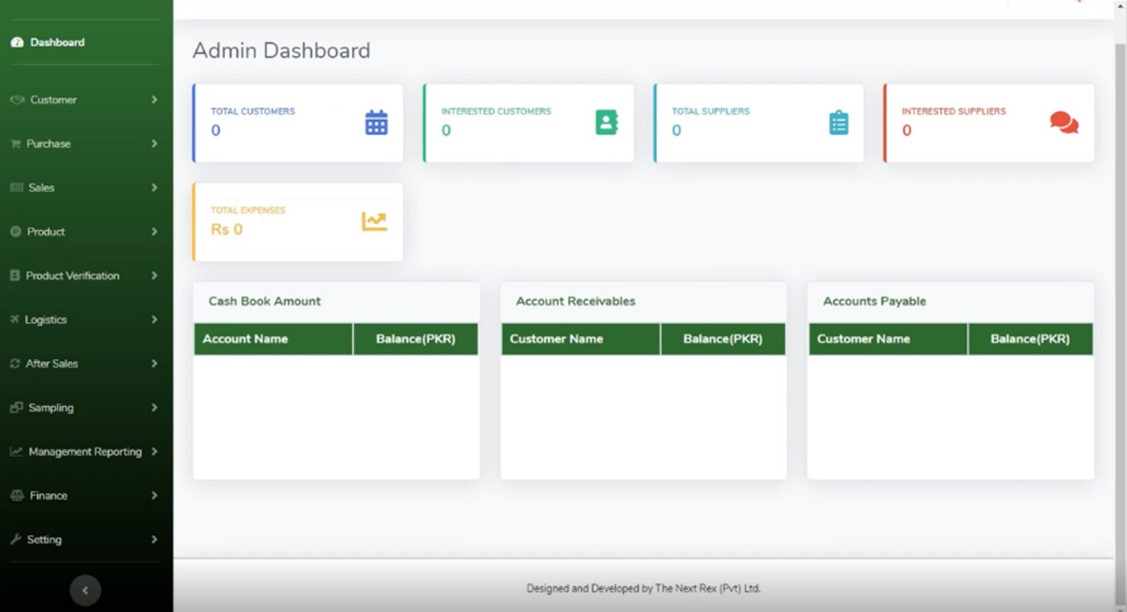
On the front page of our ERP system, our Admin Dashboard is shown with various options such as the
Contact us at info@thenextrex.pk for sales enquire or visit our contact page https://thenextrex.pk/contact
Customer Module – Trading ERP – Trading Enterprise Resource Planning System
- Total customers
- Interested customers
- Total suppliers
- Interested suppliers
- Total expenses
To purchase our Trading ERP – or need a customized ERP Please contact us at info@thenextrex.pk or visit our contact us page.
Customers – Customer Module – Trading ERP – Trading Enterprise Resource Planning System
The Dashboard also shows the cash book amount, amount receivables, and accounts payable. In the Dashboard, we have several modules.
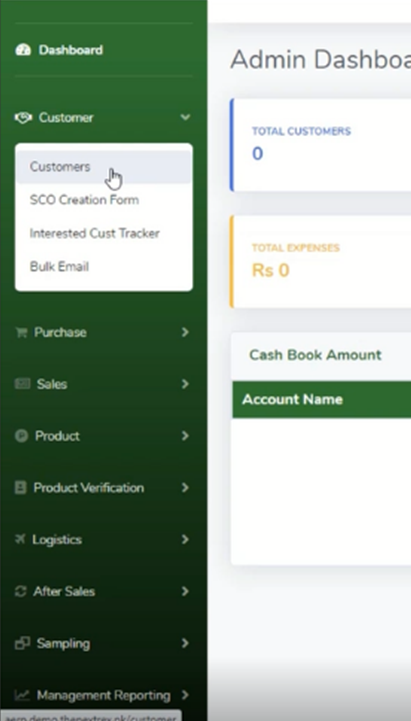
The first module is Customer. As you click on it, you are shown a drop-down menu that contains
Check out our demo for Trading ERP System – Trading Enterprise Resource Planning System
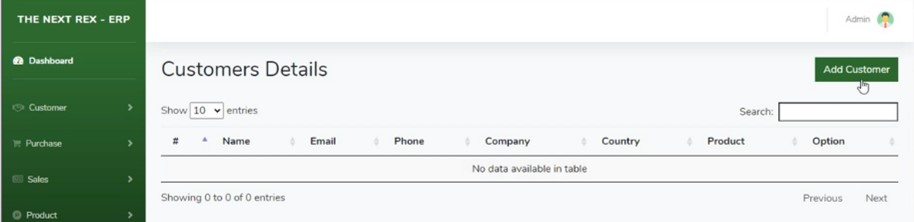
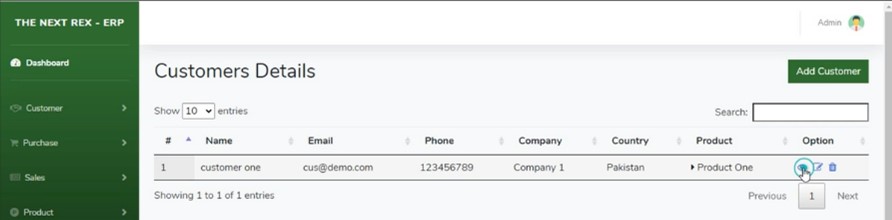
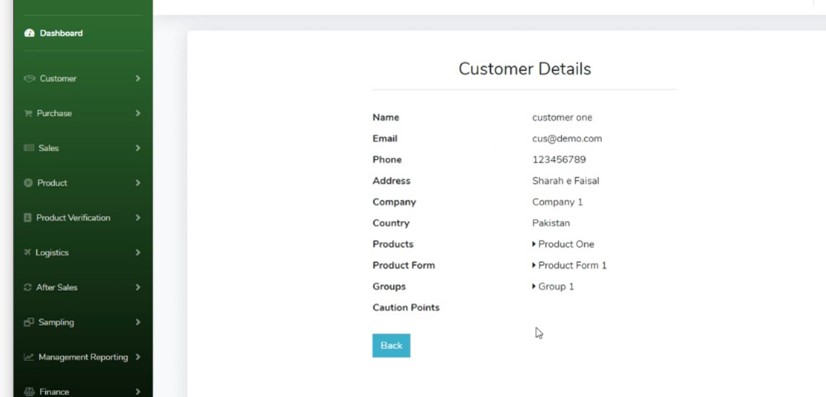
On the top right corner, you can add a customer in which the details you provide would be the following: The customer’s name, email, contact number, country, their address, the product that they have chosen, the product form, the customers company and the customers group. You can even add caution points later on.
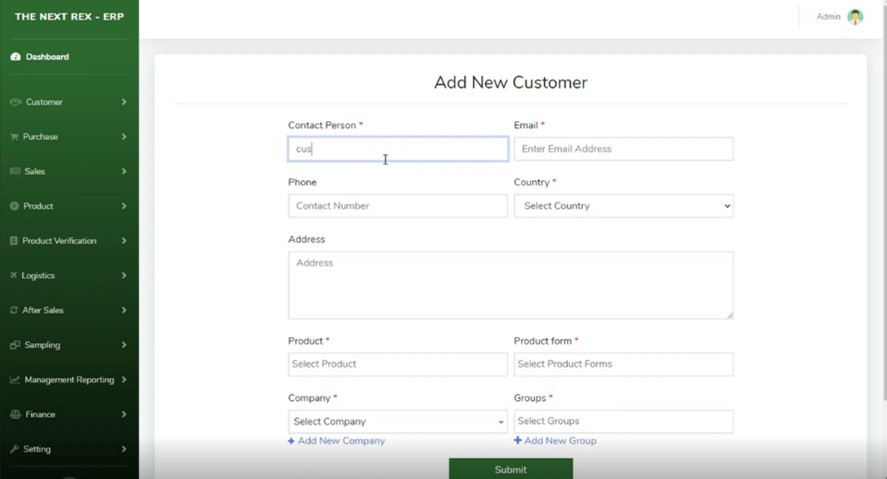
You click on submit when all the necessary details are added and the customer’s details will pop up. You can click on the eye icon on the right hand corner to view the customer’s details. The box next to the eye icon can be used to re-edit the customer details if need be.
Soft Corporate Offer (SCO) Creation Form -Customer Module – Trading ERP – Trading Enterprise Resource Planning System
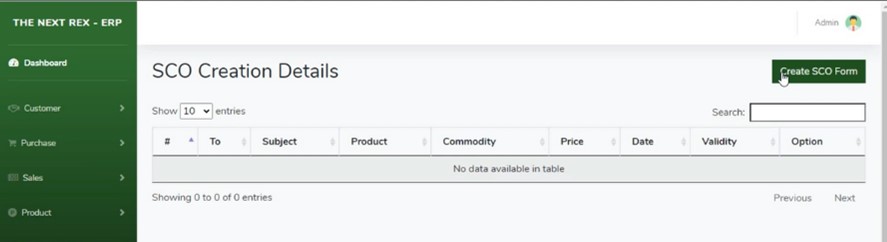
On the top right corner, you can click to create an SCO form.
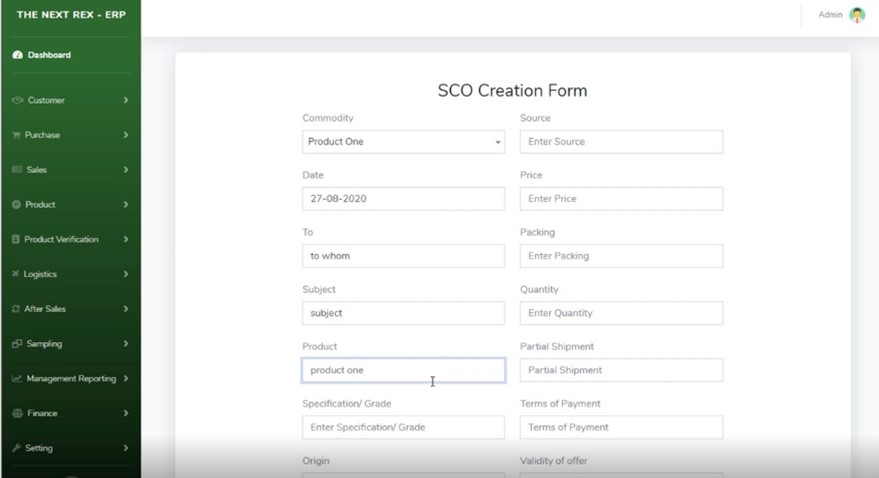
The details that would need to be provided is: the commodity, the date, the name of the person you’re sending it to, the subject, the product, the specification, the origin, the source, the price, packing, quantity for example (125 MT), partial shipment, terms of payment for example cash on delivery and the validity of the offer.
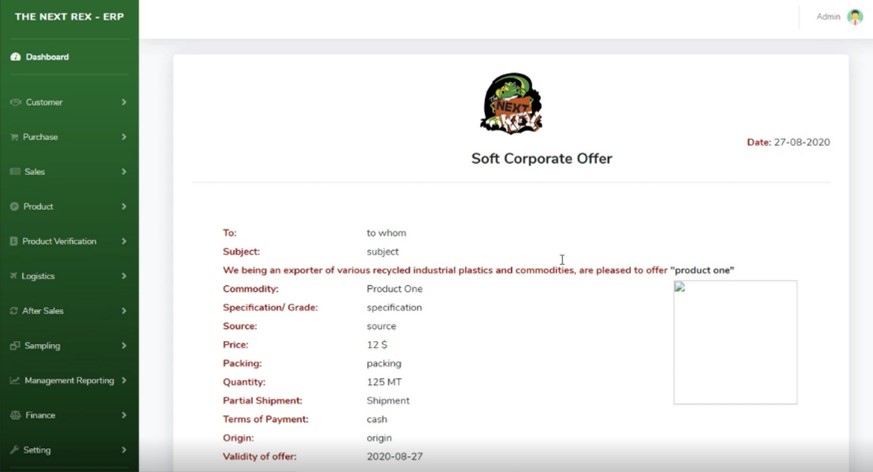
As you submit it the Soft Corporate Offer (SCO) will be in front of you. You can also export this to PDF if need be.
Interested Customer Tracker – Customer Module – Trading ERP – Trading Enterprise Resource Planning System
![]()
On the top right corner, you can add an interested customer.
![]()
The details you would need to provide is: the name of the Account Manager, the item, the customers company, the price, the origin, the customers contact information, the quantity and the sell status and the sell status date.
![]()
As you submit, the tracker will appear in which you can add remarks like pending, approve and reject.
Bulk Email – Customer Module – Trading ERP – Trading Enterprise Resource Planning System
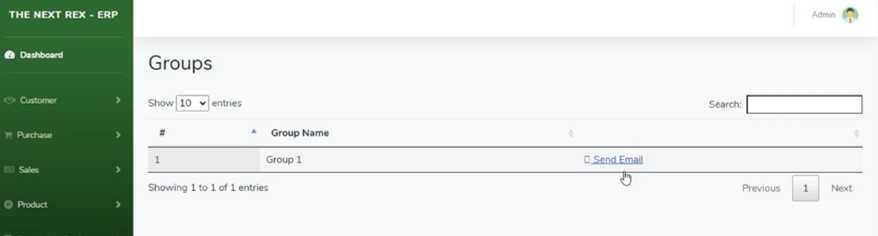
Whatever customers you add over here in the groups, it will show here. From here you can email them.
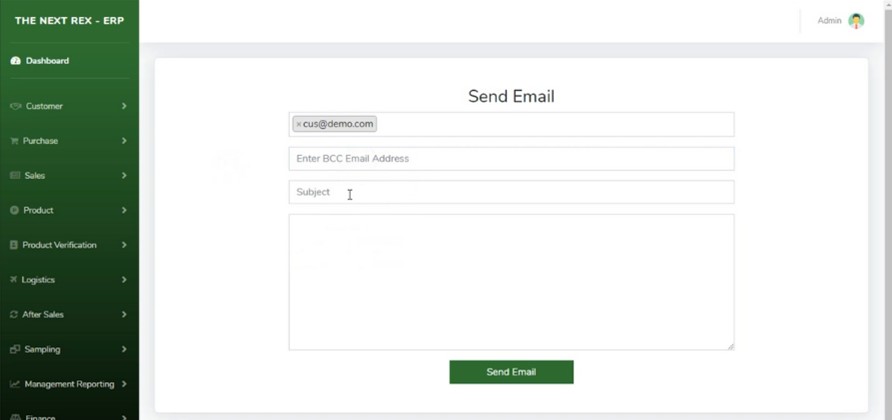
Which will automatically redirect you to compose an email with the BCC email address, subject and email.
Purchase Module – Trading ERP – Trading Enterprise Resource Planning System
On The Next Rex ERP, on the admin dashboard, on the left-hand side, there will be a tab called PURCHASE. When you click on it, it will lead to a drop-down menu that includes.
Suppliers – Purchase Module – Trading ERP – Trading Enterprise Resource Planning System
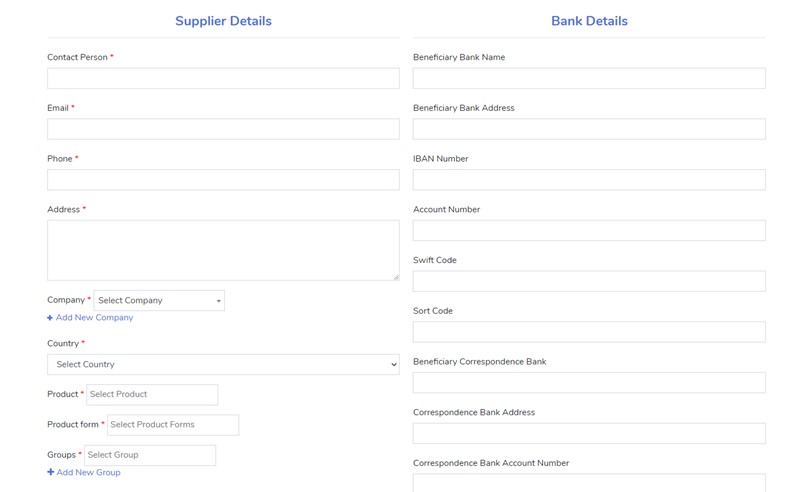
As you click on the SUPPLIER, it will open to the SUPPLIER DETAILS page. On the top right corner, when you click on the ADD SUPPLIER it will redirect you to the next page.
There are the SUPPLIER DETAILS, which include the
- CONTACT PERSON
- PHONE #
- ADDRESS
- COMPANY
- COUNTRY
- PRODUCT
- PRODUCT FORM
- GROUPS
Then there are the BANK DETAILS on your right, which include
- BENEFICIARY BANK NAME
- BENEFICIARY BANK ADDRESS
- IBAN NUMBER
- ACCOUNT NUMBER
- SWIFT CODE
- SORT CODE
- BENEFICIARY CORRESPONDENCE BANK
- CORRESPONDENCE BANK ADDRESS
- CORRESPONDENCE BANK ACCOUNT NUMBER
- CORRESPONDENCE BANK SWIFT CODE
After filling out these details, you can click on SUBMIT. Now the details will show on the main page, and you can view the full details by clicking on the EYE ICON on the far right, as well as editing the already given details that can be done as well.
Letters of Intent – Purchase Module – Trading ERP – Trading Enterprise Resource Planning System
As you click on LETTERS OF INTENT, it will open to the LETTER OF INTENT page. On the top right corner, when you click on the ADD LETTER OF INTENT it will redirect you to the next page.

The LETTER OF INTENT details include,
- DATE
- TO WHOM IT IS CONCERNING
- THE ISSUE IT IS REGARDING
- PRODUCT/COMMODITY
- QUANTITY
- ORIGIN
- INCO TERMS
- DESTINATION PORT
- PAYMENT
- INSPECTION
- PACKING REQUIRED
After filling out these details, you can click on SUBMIT. Now the LETTER OF INTENT will show on the main page, and you can CLICK TO EXPORT IT AS A PDF if need be.
Purchase order – Purchase Module – Trading ERP – Trading Enterprise Resource Planning System
As you click on PURCHASE ORDER, it will open to the PURCHASE ORDER DETAILS page. On the top right corner, when you click on the ADD PURCHASE ORDER it will redirect you to the next page.
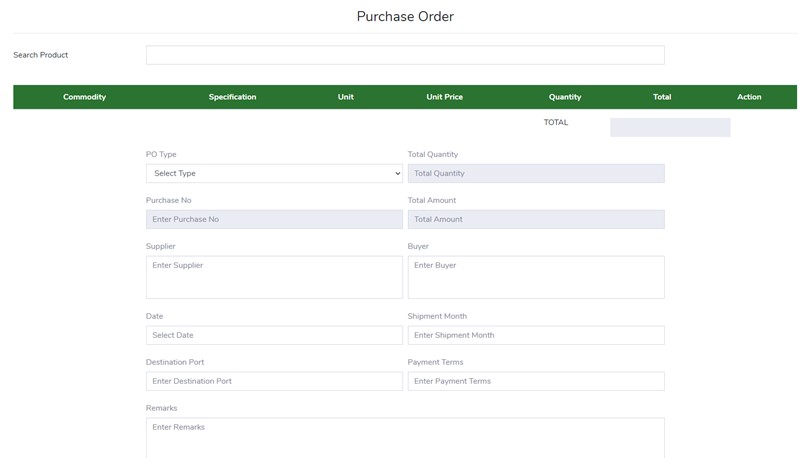
The PURCHASE ORDER details include:
- The search bar at the top where you can SEARCH FOR A PRODUCT
- After searching it up, the COMMODITY i.e. the product with the details will come up. Along with the SPECIFICATIONS (e.g. sold items), the UNIT (e.g. KG), the UNIT PRICE (e.g. 10), the QUANTITY (e.g. 51). The TOTAL will be automatically calculated and displayed.
- The additional details that need to be added would include:
- PO TYPE (e.g. ABC Corporation, ABC textile mills, etc.)
- PURCHASE NUMBER
- SUPPLIER NAME, COMPANY, AND DETAILS
- BUYER NAME, COMPANY, AND DETAILS
- DATE
- SHIPMENT MONTH
- DESTINATION PORT
- PAYMENT TERMS
- REMARKS
After filling out these details, you can click on SUBMIT. Now the PURCHASE ORDER will show on the main page, and you can CLICK TO EXPORT IT AS A PDF if need be.
Now the details will show on the main page, and you can view the full details by clicking on the EYE ICON on the far right, as well as editing the already given details that can be done as well.
Purchase Record Form – Purchase Module – Trading ERP – Trading Enterprise Resource Planning System
As you click on PURCHASE RECORD FORM, it will open to the PURCHASE RECORDS page. On the top right corner, when you click on the ADD PURCHASE RECORD it will redirect you to the next page.
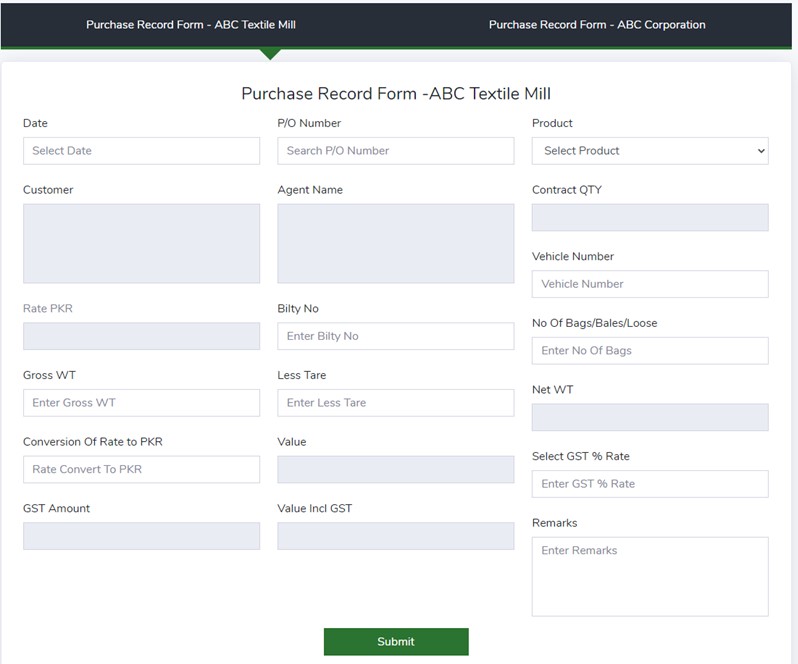
There are 2 types of PURCHASE RECORD FORM, one is for
- TEXTILE MILL and CORPORATION – the details would include the following:
- DATE
- P/O NUMBER
- PRODUCT – the customer, agent name, contract quantity, rate PKR will be automatically added.
- VEHICLE NUMBER
- BILTY NUMBER
- NUMBER OF BAGS/BALES/LOOSE
- GROSS WT – automatically calculate the NET WT
- LESS TARE
- CONVERSION OF RATE TO PKR which will automatically calculate the VALUE
- SELECT GST PERCENTAGE RATE which will automatically calculate the GST AMOUNT and the VALUE INCL. GST.
- REMARKS
After filling out these details, you can click on SUBMIT. Now the PURCHASE RECORD FORM will show on the main page, and you can CLICK TO EXPORT IT AS A PDF if need be.
Possible Tracker – Purchase Module – Trading ERP – Trading Enterprise Resource Planning System
As you click on POSSIBLE TRACKER, it will open to the POSSIBLE SUPPLIER TRACKER page. On the top right corner, when you click on the ADD POSSIBLE SUPPLIER it will redirect you to the next page.
![]()
The details that you would need to ADD POSSIBLE TRACKER includes:
- ACCOUNT MANAGER
- ORIGIN
- ITEM
- SUPPLIER
- SUPPLIER CONTACT
- PRICE
- QUANTITY
- SELL STATUS
- DATE STATUS UPDATED
After clicking on SUBMIT, it will redirect you to the home page where the account details will be shown. You can select the status as either APPROVE, PENDING, or REJECT.
Bulk email – Purchase Module – Trading ERP – Trading Enterprise Resource Planning System
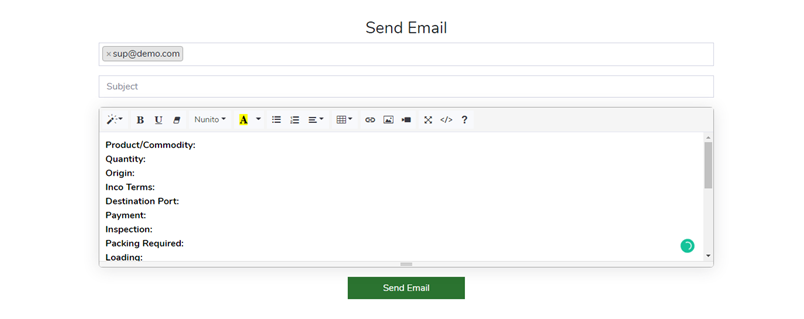
As you click on BULK EMAIL, it will open to the SUPPLIER BULK EMAIL page. The GROUP NAME is displayed where the groups are listed below. There’s an option of clicking on SEND EMAIL which will forward you to composing an email, with the EMAIL ADDRESS, SUBJECT, and then the email.
Sales Module – Trading ERP System – Trading Enterprise Resource Planning System
In the drop-down menu for sales, there is
- Proforma Invoice,
- Delivery Order,
- Sale Record Form,
- Commercial Invoice,
- Packing List,
- Loading Inspection Report and
- Sales Tax Invoice.
Proforma Invoice – Sales Module – Trading ERP System – Trading Enterprise Resource Planning System
As you click on the Proforma Invoice, it will redirect you to the page where on the top write you can click to create Proforma Invoice. On this Proforma invoice, as you search for a product, it will display the commodity’s specification, its unit price, the unit (e.g. KGS), and the quantity. The total is calculated automatically.
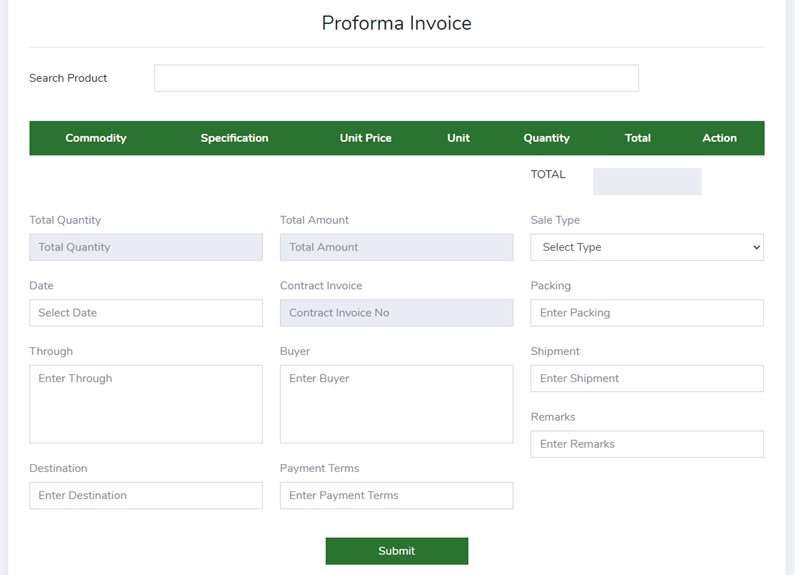
You can then select
- the preferred sale type which can include
- overseas (ABC corporation),
- export (ABC textile) and
- Local (ABC textile).
- The date
- The contract invoice will be given
- Packing
- Who it is through
- The buyer
- Shipment
- Destination
- Payment terms
- Remarks
When you submit these details, the Proforma invoice will be made and displayed. On the bottom right-hand side, you can click to export it as a PDF.
Delivery Order – Sales Module – Trading ERP System – Trading Enterprise Resource Planning System
As you click on the Delivery Order, it will redirect you to the page where on the top write you can click to create Delivery Order. You can then search for the product by writing the Proforma Invoice Number. The particulars will then be displayed along with the quantity and remarks you would like to give.
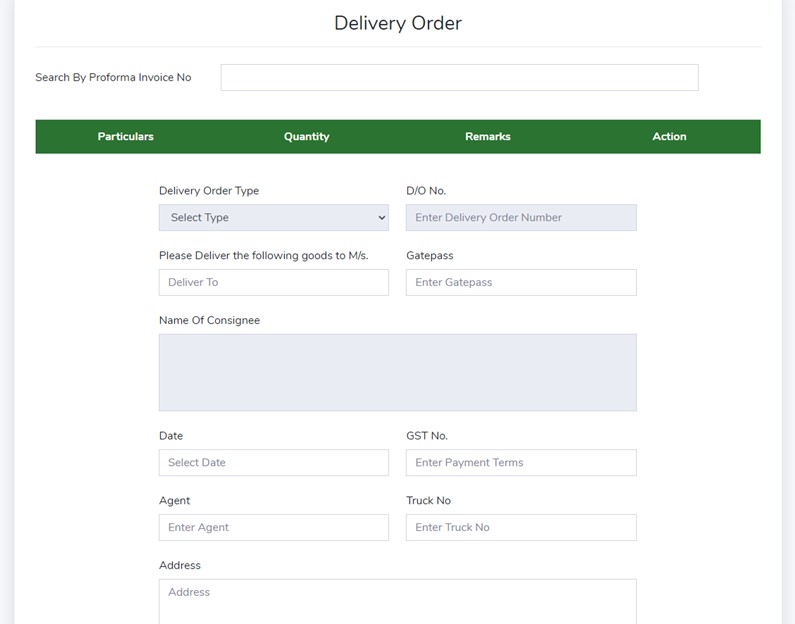
The details that you would add are
- Deliver the following goods to
- Gate pass
- Date
- GST Number
- Agent
- Truck Number
- Address
- NTN Number
- Attention to
- Attention Address
When you submit these details, the Delivery Order will be made and displayed. On the bottom right-hand side, you can click to export it as a PDF.
Sale Record Form – Sales Module – Trading ERP System – Trading Enterprise Resource Planning System
As you click on the Sale Record Form, it will redirect you to the page where on the top write you can click to create Sale Record. You can either create a Sale Record Form for a textile mill or a corporation.
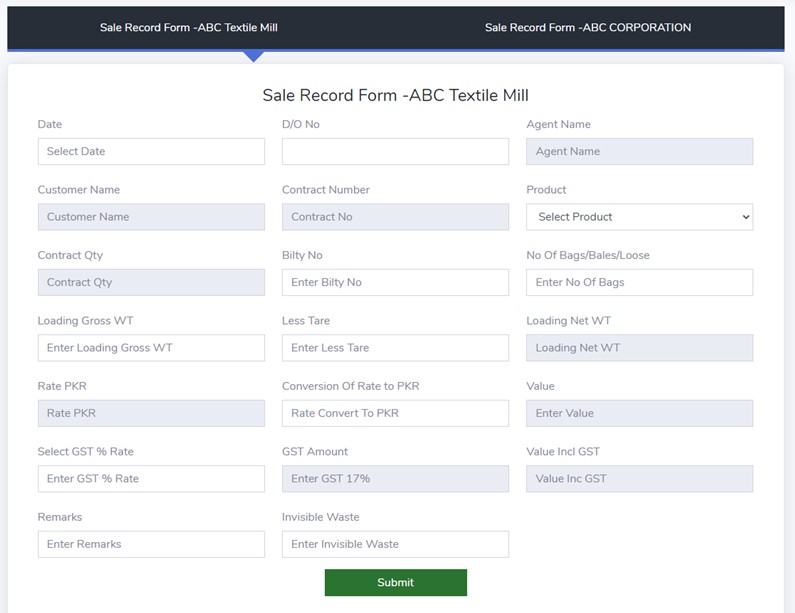
The details that need to be filled in would be
- Date
- D/O number
- Product
- Bilty number
- Number of bags/bales/loose
- Loading Gross WT
- Less Tare
- Conversion of Rate to PKR – value is automatically calculated
- Select GST % Rate
- Remarks
- Invisible waste
When you submit these details, the Sale Record Form will be made and displayed. On the bottom right-hand side, you can click to export it as a PDF.
Commercial Invoice – Sales Module – Trading ERP System – Trading Enterprise Resource Planning System
As you click on the Commercial Invoice, it will redirect you to the page where on the top write you can click to create Commercial Invoice. You can either create a Commercial Invoice for a textile mill or a corporation. You can then search for the product by writing the Proforma Invoice Number. The products particulars will then be displayed along with the description, unit price, unit, quantity, total, and remarks you would like to give.
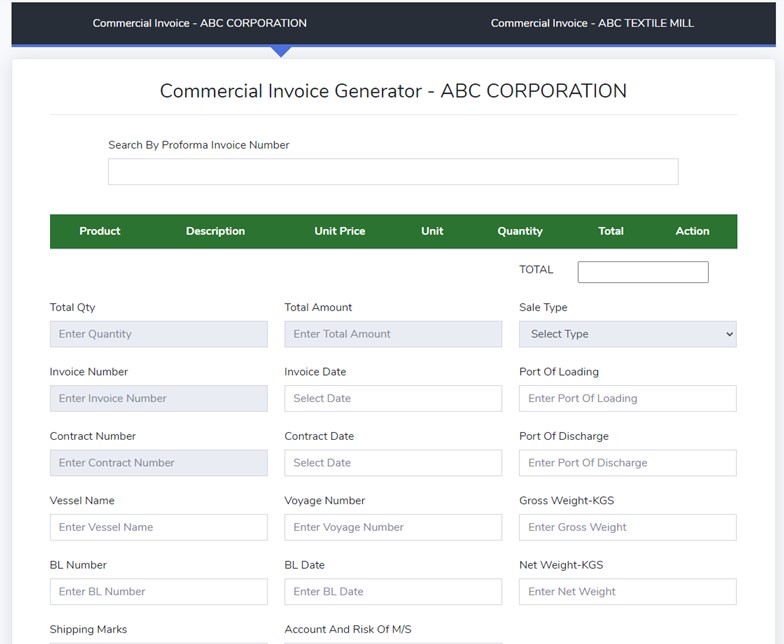
The details you will need to fill in would be:
- The invoice date
- Invoice of
- Form E Number
- Form E Date
- Port of Loading
- BL Number
- BL Date
- Port of Destination
- Shipped Per
- Gross Weight (KGs)
- Shipping Marks
- Account and Risk of M/S
- Less Tare
- Net Weight
When you submit these details, the Commercial Invoice will be made and displayed. On the bottom right-hand side, you can click to export it as a PDF.
Packing List – Sales Module – Trading ERP System – Trading Enterprise Resource Planning System
As you click on the Packing List, it will redirect you to the page where on the top write you can click to create Packing List. To create a Packing List, you will have to fill in the following details.
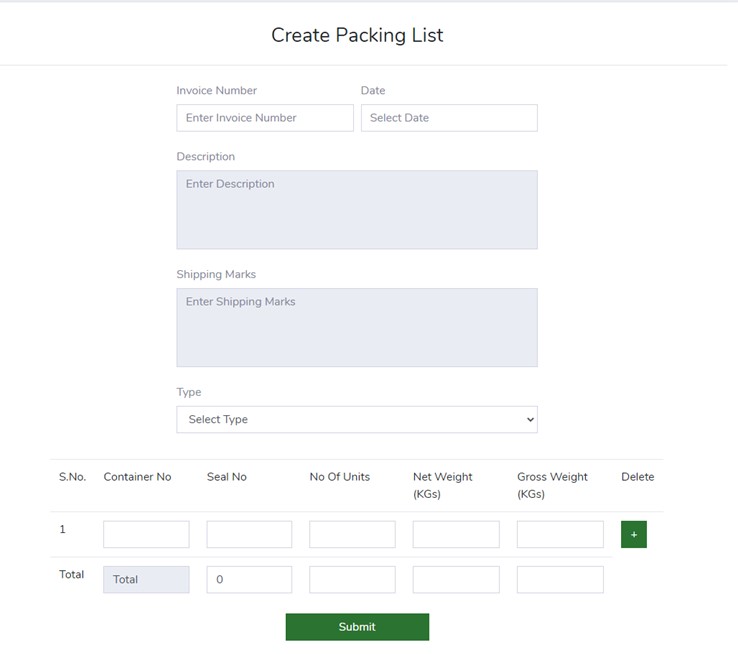
- Invoice Number
- Date
- Description
- Shipping marks
- Select the type (corporation or textile mills)
- For each package you add, will need to provide the following and the total will be automatically calculated.
- the container number,
- the seal number,
- the number of units,
- the net weight (KGs),
- the gross weight (KGs)
When you submit these details, the Packing List will be made and displayed. You can then download, edit, or delete it.
Loading Inspection Report – Sales Module – Trading ERP System – Trading Enterprise Resource Planning System
As you click on the Loading Inspection Report, it will redirect you to the page where on the top write you can click to either import or download document. If you choose to import the Loading Inspection Report, you would have to fill in the following details:
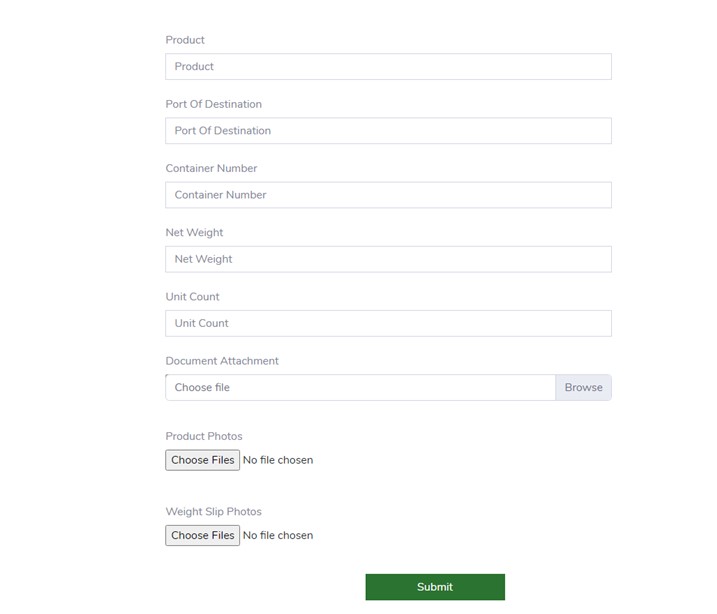
- product
- port of destination
- container number
- net weight
- unit count
- document attachment
- product photos
- weight slip photos
When you submit these details, Loading Inspection Report will be made and displayed. With the eye icon, you can view the Loading Inspection Report details.
Sales Tax Invoice – Sales Module – Trading ERP System – Trading Enterprise Resource Planning System
As you click on the Sales Tax Invoice, it will redirect you to the page where on the top write you can click to create Sales Tax Invoice. You can then search for the product in the search bar. The Goods particulars will then be displayed along with the unit price, unit, quantity, Ex Sales Tax, Rate Sale Tax %, Total Sale Tax, and Incl Sale Tax. The details you will need to fill in are the following:
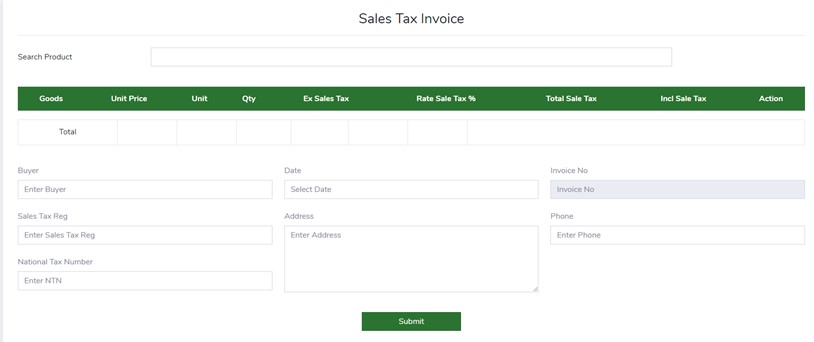
- Buyer
- Date
- Sales Tax Registration
- Address
- Phone
- National Tax Number
When you submit these details, the Sales Tax Invoice will be made and displayed. On the bottom right-hand side, you can click to export it as a PDF.
Product Module – Trading ERP – Trading Enterprise Resource Planning System
In the drop down menu, the options include Product Registration and Product Stock List.
When you click on Product Registration, it opens to a new page. On the top right corner as you click on Add Product, it will redirect you to the new page where you are required to fill in the following details:
- Product Name
- Product Category
- Product Type
- Product Form
- Product Origin
- Expected Quantity
- Loading Weight
- Packing Type
- Specifications
- Payment Method (Cash, Bank or Others)
- Other comments
- Photo from chosen files on your device
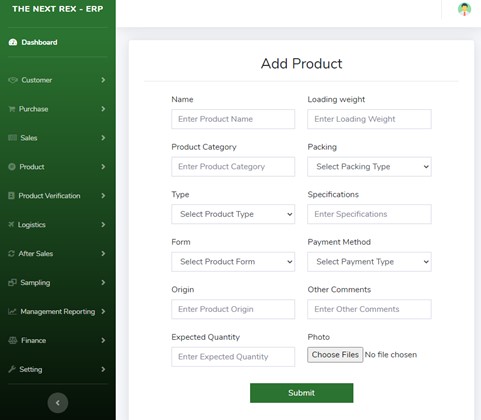
As you click on Submit, it will open up the Product Registration, where through the eye icon on the right hand side you can view the Product Detail.
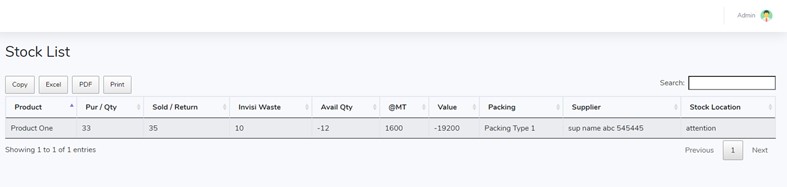
When you click on Product Stock List, it opens to a new page. The Stock List is displayed where the
- Product,
- Quantity,
- Sold/Return,
- Invisi Waste,
- Avail Quantity,
- @MT,
- Value,
- Packing,
- Supplier and
- Stock Location.
You then have the options of Copy, Excel, PDF, or Print.
Product Verification Module – Trading ERP – Enterprise Resource Planning System
In the drop down menu, the options include Approved Vendor and Instructions & Scope
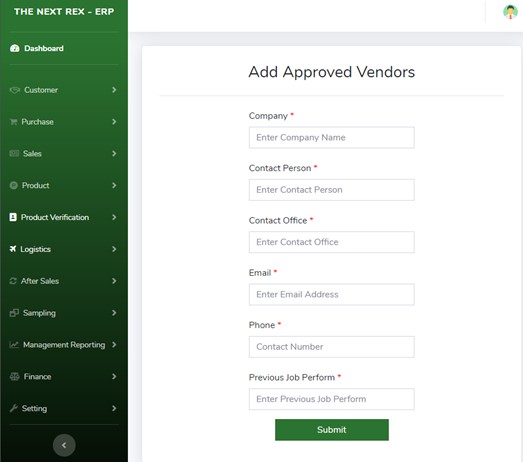
When you click on Approved Vendor, it opens to a new page. On the top right corner as you click on Add Approved Vendor, it will redirect you to the new page where you are required to fill in the following details:
- Company Name
- Contact Person
- Contact Office
- Email Address
- Contact Number
- Previous Job Perform
As you click on Submit, it will open up the Approved Vendors page where you can edit or delete.
When you click on Instructions & Scope, it opens to a new page. On the top right corner as you click on Add Instructions & Scope, it will redirect you to the new page where you are required to fill in the following details:
- Instructions to Cotecna for Inspection of
- Commodity
- Purpose
- Please pay special attention to the following
- Loading Plan
- Contact Person for Shipper in Taiwan
- Warehouse Loading Address
- Loading Date
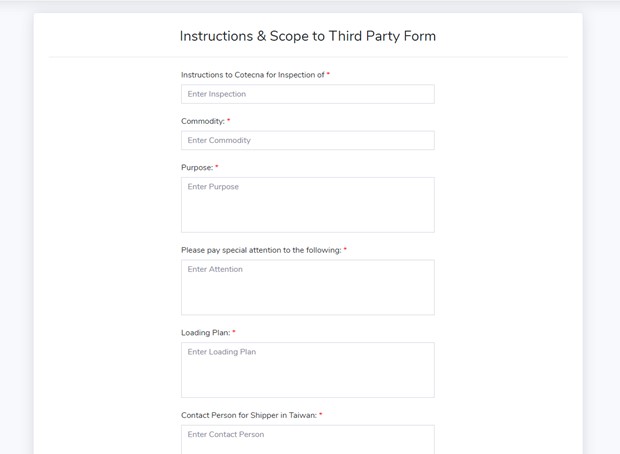
As you click on Submit, it will open up the Instructions & Scope to Third Party page where you can view the details and export it as a PDF with the help of the eye icon, as well as edit or delete it.
Logistics Module – Trading ERP – Enterprise Resource Planning System
As you click on Logistics, it leads to a drop-down bar containing
- Freight Rate List
- BL Draft
- Approved Forwarders
- Bulk Email
1 – Freight Rate List – Logistics Module – Trading ERP – Enterprise Resource Planning System
As you click on the Freight Rate list, it opens to a new page where on the top right corner you can Add Freight Rate. The details you would need to create your Freight Rate would consist of the following:
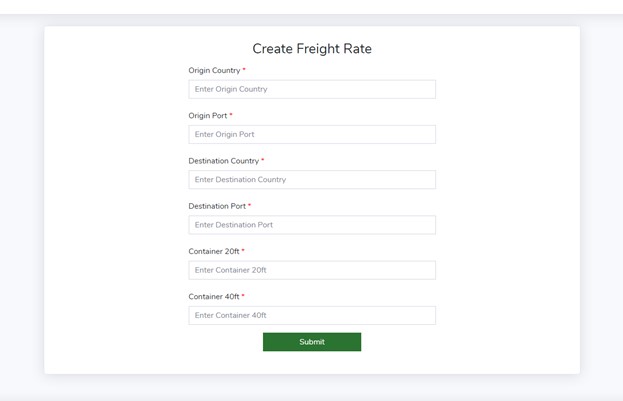
- Origin Country
- Origin Port
- Destination Country
- Destination Port
- Container 20ft
- Container 40ft
The Freight Rate will then be displayed on the main page, where you can either export it as a PDF, Excel, or Print it. You can also edit/add details if the need arises or the option to delete it.
2 – BL Draft – Logistics Module – Trading ERP – Enterprise Resource Planning System
As you click on the BL Draft, it opens to a new page where on the top right corner you can create a BL Draft. The details you would need to create your BL Draft would consist of the following:
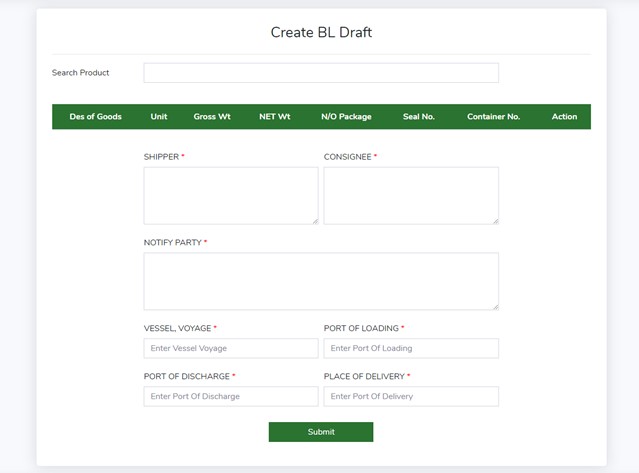
- Searching for the desired product in the search bar and filling in the details:
- Unit
- Gross Wt
- Net Wt
- N/O Package
- Seal No.
- Container No.
- Shipper
- Consignee
- Notify Party
- Vessel Voyage
- Port of Loading
- Port of Discharge
- Place of Delivery
The BL Draft will then be displayed on the main page, where you can export it as a PDF.
3 – Approved Forwarders – Logistics Module – Trading ERP – Enterprise Resource Planning System
As you click on the Approved Forwarders, it opens to a new page where on the top right corner you can create new Approved Forwarders. The details you would need to create your Approved Forwarders would consist of the following:
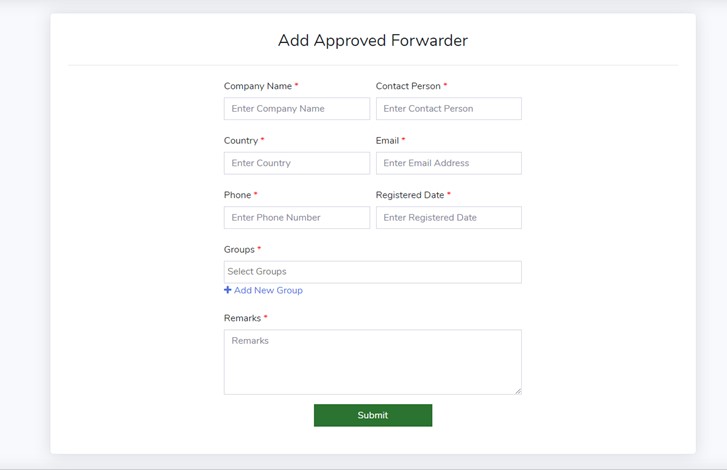
- Company Name
- Contact Person
- Country
- Email Address
- Phone Number
- Registered Date
- Groups
- Remarks
The Approved Forwarders will then be displayed on the main page, where you can edit/add details if the need arises or the option to delete it.
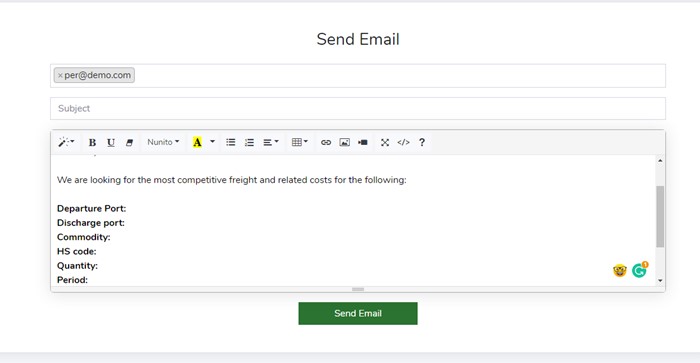
4 – Bulk Email – Logistics Module – Trading ERP – Enterprise Resource Planning System
You can send an Email to whichever Group you choose. With your email address, the Subject, and the message, you can easily email from within our software itself.
After Sales – ERP Module – Trading ERP – Enterprise Resource Planning System
As you click on After Sales, it leads to a drop-down bar containing Complain History. You can Add a New Complain by clicking on the top right-hand box. When you’re adding a Supplier’s / Buyer’s Complaint, the following details must be filled in:
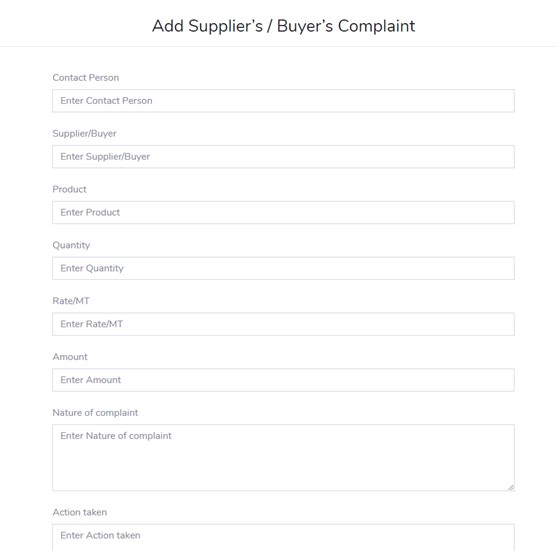
- Contact Person
- Supplier/Buyer
- Product
- Quantity
- Rate/MT
- Amount
- Nature of Complaint
- Action Taken
As you submit the Complaint, you can view and then export it as a PDF, Edit, or Delete the complaint. You can also change the status of the Complaint: Approve, Pending, or Reject.
Sampling Module – ERP Module – Trading ERP – Enterprise Resource Planning System
As you click on Sampling, it leads to a drop-down bar containing the following:
1. Sample Inventory List
2. Sample Tracker Inwards
3. Sample Tracker Outwards
4. Sample Invoice
5. Sample Rates
6. MSDS Database
7. Sample v Sales Analysis
Sample Inventory List – Sampling – ERP Module – Trading ERP – Enterprise Resource Planning System
As you click on the Sample Inventory List, it will open to a new page where on the top right-hand corner you can Add Sample. To create a Sample Inventory List, the following details will need to be provided.
- Item Name
- Country
- Regular
- Weight/GM
- Required Stock (GM)
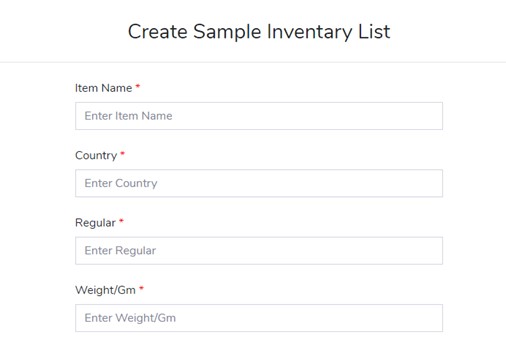
Sample Inventory List Entries list: Trading ERP System – Trading Enterprise Resource Planning System

When you submit these details, it will be displayed on the homepage, where the options include In (the Net Weight would be calculated), Out (the Net Weight would be calculated), viewing the Sample Inventory Detail, editing it or deleting it.
Sample Tracker Inwards – Sampling Module – ERP Module – Trading ERP – Enterprise Resource Planning System
As you click on the Sample Tracker Inwards, it will open to a new page where on the top right hand corner you can Add New Inward. To create a Sample Tracker Inwards Form, the following details will need to be provided.
- Tracking No.
- Country
- Sender Company
- Item
- Sender Name
- Courier
- DHL
- TNT
- FEDEX
- LEOPARDS
- DTDC
- Arrival Date
- STM Account
- Weight
- Result (Optional)
![]()
When you submit these details, it will be displayed on the homepage, where the options include selecting the Status (Delivered, In Transit, or Reject), View the Sample Tracker Inwards Details, edit or then delete.
Sample Tracker Outwards – Sampling Module – ERP Module – Trading ERP – Enterprise Resource Planning System
As you click on the Sample Tracker Outwards, it will open to a new page where on the top right-hand corner you can Add New Outward. To create a Sample Tracker Outwards Form, the following details will need to be provided.
- Tracking No.
- Country
- Sender Company
- Item
- Attention Person
- Courier
- DHL
- TNT
- FEDEX
- LEOPARDS
- DTDC
- Dispatch Date
- Arrival Date
- Feedback (Optional)
When you submit these details, it will be displayed on the homepage, where the options include selecting the Status (Delivered, In Transit, or Reject), View the Sample Tracker Outwards Details, edit or then delete.
Sample Invoice – Sampling Module – ERP Module – Trading ERP – Enterprise Resource Planning System
As you click on the Sample Invoice, it will open to a new page where on the top right-hand corner you can Add New Sample Invoice. To create a Sample Invoice, the following details will need to be provided.
- As you search for the product, the details will appear including Quantity, Description, Price, and Amount.
- The Invoice Number is already there
- Date
- Shipper Per
- Port of Loading
- Port of Destination
- Account and risk of
- Company Name
- Attention Person
- Phone Number
- Address
- Weight
- Gross Weight
- Less Weight
- Net Weight
As you click on submit, it will direct you to the Commercial Invoice created where you are given the option to Export is as a PDF.
Sample Rates – Sampling Module – ERP Module – Trading ERP – Enterprise Resource Planning System
As you click on the Sample Rates, it will open to a new page where on the top right-hand corner you can Add Sample Rates. To Add Sample Rates Details, the following will need to be provided.
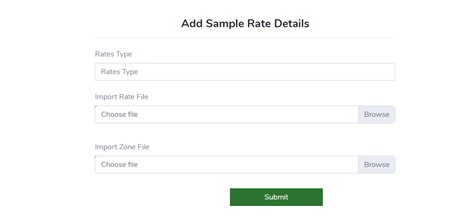
- Rates Type
- Import Rate File
- Import Zone File
When you submit these details, it will be displayed on the homepage, where the options include downloading either the Rates File or Zone File, edit or then delete.
MSDS Database – Sampling Module – ERP Module – Trading ERP – Enterprise Resource Planning System
As you click on the MSDS Database, it will open to a new page where on the top right-hand corner you can Import MSDS. To Import MSDS, the following will need to be provided.
- Product Name
- Import File
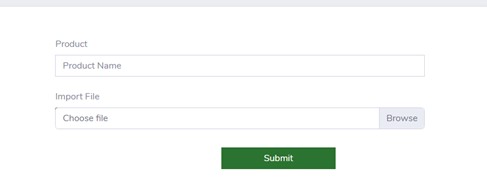
When you submit these details, it will be displayed on the homepage, where the options include downloading the MSDS File or then delete it.
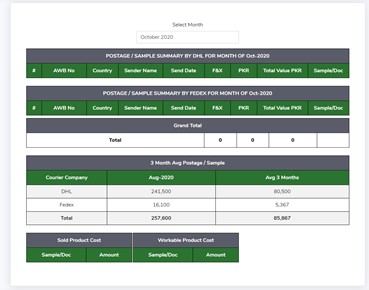
Sample v Sales Analysis – Sampling Module – ERP Module – Trading ERP – Enterprise Resource Planning System
As you click on the Sample v Sales Analysis, it will open to a new page where on the top right-hand corner you can do two things: get a Sample Summary or Create New Record. To Create a New Sample Record, the following will need to be provided.
- AWB No.
- Country
- Sender Name
- Sending Date
- Currency
- Currency Rate
- Amount
- Total Amount (PKR)
- Sample/Document
- Courier Company (DHL or FEDex)
- Type (Sold/Workable)
Then you can view the Sample Summary for whichever month you want.
Management Reporting – ERP Module – Trading ERP – Enterprise Resource Planning System
As you click on Management Reporting, it will lead to a drop-down menu that includes:
- Bank Accounts
- Cash Book Report
- Bank Reconciliation
- Account Receivables
- Accounts Payable
- Product Sale Report
- Profit and Loss Report
- Expense Report
Bank Accounts – Management Reporting – ERP Module – Trading ERP – Enterprise Resource Planning System
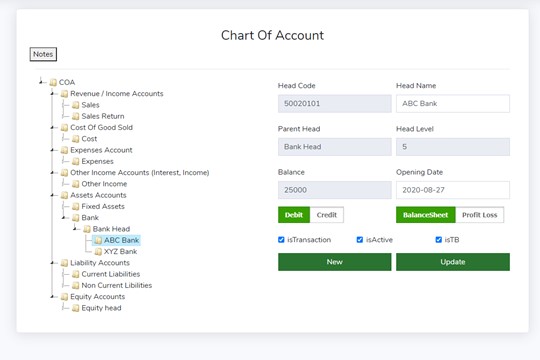
Clicking on Finance tab on the left-hand side will lead you to the Chart of Accounts. Under Asset Accounts, clicking on the
- Bank
- Bank Head
This will open on the side where the details include:
- Head Code
- Head Name
- Parent Head
- Head Level
- Balance (Debit or Credit)
- Opening Date
- The boxes that you can tick:
- isTransaction
- isActive
- isTB
- Choose between either a Balance Sheet or Profit Loss.
You can then either create a new one or save this one. Now under Management Reporting, the Bank Account details will be saved where you can view or edit them:
- Account Name
- Account Number
- Branch Name
- Bank Category
- Local Bank Accounts – STM
- Partners and Children’s PKR Account
- Partners and Children’s FCY Account
- Overseas FCY Account
As you submit the details, it will appear in the Bank Accounts.
Cash Book Report – Management Reporting – ERP Module – Trading ERP – Enterprise Resource Planning System
As you click on the Cash Book Report, it will open to a page where you need to enter in the date and select the Account Name (ABC Child, ABC Bank etc.). The details that will appear are:
- Opening Balance
- Document Reference
- Particular
- Receipts
- Payments
- Net Payments / Receipts
- Current Balance
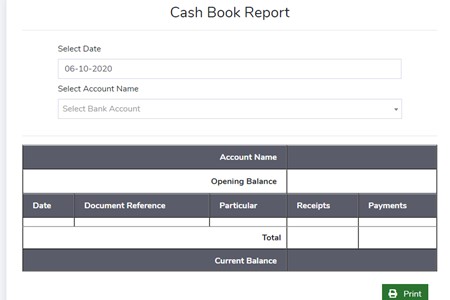
You then have the option to Print the above details.
Bank Reconciliation – Management Reporting – ERP Module – Trading ERP – Enterprise Resource Planning System
As you click on the Bank Reconciliation, it opens to a new page where on the top right hand you can Create a New Statement. To create a new reconciliation report, the following details need to be filled in:

Balance As Per Bank Statement:
- Date
- Account Name
- Account No.
- Branch Name/Code
- Cash Balance as per Bank Statement
- Cheque deposit receiving by us (In Transit)
- Outstanding cheque paid by us to vendor (Deduct)
- Adjusted Balance
Balance As Per Depositors Record:
- As per Depositor Cash Balance
- Interest (Earn / Paid) – Add
- Bank Services Charges – Deduct
- Bank Error – Deduct
- Other Error – Deduct
- Adjusted Cash Balance
As you submit, the details will be displayed on the main page where you can view, edit or delete it.
Account Receivables – Management Reporting – ERP Module – Trading ERP – Enterprise Resource Planning System
As you click on the Account Receivables, it opens to a new page where on the top right hand you can create an Account Receivable. To create an Account Receivable Entry, the following details need to be filled in:
- Invoice Date
- Invoice Number
- Customer
- Description
- Total Amount
- Received Amount
- Balance
- Due Date
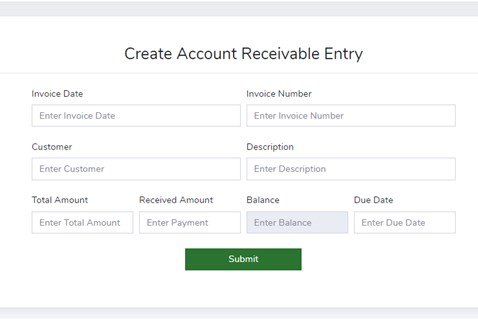
As you submit, the details will be displayed on the main page where you can view and then export is as a PDF, edit or delete it. You can also Add Payment and Payment Date, which will then show in the Account Receivables Details.
Accounts Payable – Management Reporting – ERP Module – Trading ERP – Enterprise Resource Planning System
As you click on the Accounts Payable, it opens to a new page where on the top right hand you can create an Accounts Payable. To create Accounts Payable Entry, the following details need to be filled in:
- Invoice Date
- Invoice Number
- Supplier
- Description
- Total Amount
- Pay amount
- Balance
- Due Date
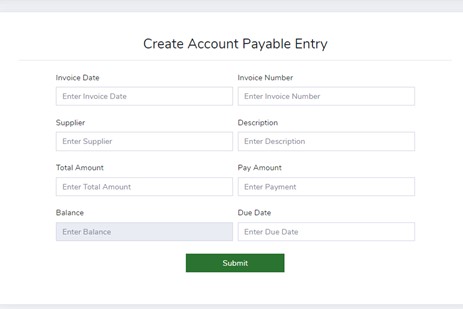
As you submit, the details will be displayed on the main page where you can view and then export is as a PDF, edit or delete it. You can also Add Payment and Payment Date, which will then show in the Account Payables Details.
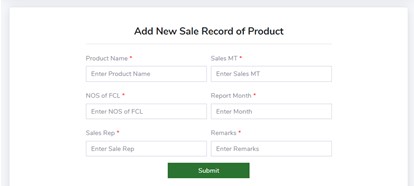
Product Sale Report – Management Reporting – ERP Module – Trading ERP – Enterprise Resource Planning System
As you click on the Product Sale Report, there are 3 different reports:
- Create New Record
- Add New Sale Record of Product:
- Product Name
- Sales MT
- NOS of FCL
- Report Month
- Sales Rep
- Remarks
- This will then create a New Sale Record.
- Add New Sale Record of Product:
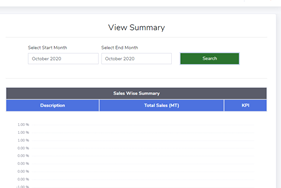
2. Summary Report
- Select Start Month
- Select End Month
- You can then view the Summary Report.
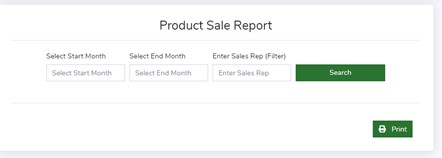
3. Product Wise Report
- Product Sale Report:
- Select Start Month
- Select End Month
- Enter Sales Rep (Filter)
- Then when you search it will display the details which you can then print.
- Product Sale Report:
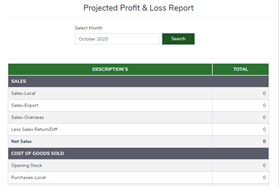
Profit and Loss Report – Management Reporting – ERP Module – Trading ERP – Enterprise Resource Planning System
You can view the Monthly Report or Create a New Record. To Add a New Profit and Loss Record, you will need to supply the Product Name and Report Month.

- Sales
- Sales-Local
- Sales-Export
- Sales-Overseas
- Less Sales (Return/Diff)
- Net Sales
- Notes (Reprocessing / Purchase Expenses)
- Bags Packing
- Labour Charges
- Misc Exp
- Conveyance
- Clearance Exp
- Insurance Exp
- Transportation Inward
- Custom Exp
- Custom-Sundry
- Shaval Chg
- Tractor Chg
- Purchase Store
- Bags Purchase
- Postage / Sample
- Lifter Charges
- Unseen Exp 1, 2, 3, 4, and 5
- Travelling exp-Germany (Machine)
- Total Reprocessing Exp.
- Cost of Goods Sold
- Opening Stocks
- Purchases – Local
- Purchases – Imp
- Purchases – Overseas
- Add: Reprocessing Exp
- Cost of Goods Available
- Less: Closing Stock
- COGS
- Gross Profit
- Selling Expenses
- Postage / Sample Exp
- Freight Export and Clearing
- Transportation Export
- MISC Export / Bl Exp
- MISC / Convenience
- Testing / Inspection
- Export Commission
- Export Lifter / Labor Charge
- Traveling Expenses
- Insurance Export
- Salary – Cont
- Client Entertainment
- Clearing Charges
- Unseen Exp 1,2,3,4 & 5
- Total selling Exp
- Financial Expenses
- Short realization
- Bank Charges
- Bank Com and discount
- EDS charges
- FED Charges
- Unseen Exp 1,2,3,4 & 5
- Total Selling EXP
In the end, the Net Profit/Loss and the KPI % will be calculated. As you submit it, the details will be displayed on the main page where you can view the Projected Profit and Loss Details which you can then download as well, edit or then delete it.
You can view the Monthly Report of Projected Profit and Loss Report by selecting the month and searching it. You can then have the option of printing it.
Expense Report – Management Reporting – ERP Module – Trading ERP – Enterprise Resource Planning System
You can view the Monthly Report or Add a New Expense. To Add a New Expense, you will need to supply the:
- Expense Department
- Title of Account
- Expense Date
- Amount
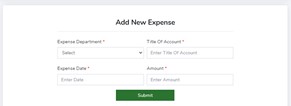
When you submit, it will appear on the main page where you can edit or delete it.
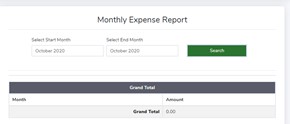
You can view the Monthly Expense Report by selecting the start month and the ending month and then searching for it.
Finance Module – Trading ERP – Enterprise Resource Planning System
When you click on finance, it leads to a drop down menu which includes:
- Chart of Account
- Vouchers
- Payment I Receipt
- Sale I Purchase I Journal
- Ledgers
- Trial Balance
- Balance Sheet
- Profit & Loss
- Chart of Account
- Revenue / Income Accounts
- Cost of Goods Sold
- Expenses Account
- Other Income Accounts (Interest, Income)
- Assets Accounts
- Liability Accounts
- Equity Accounts
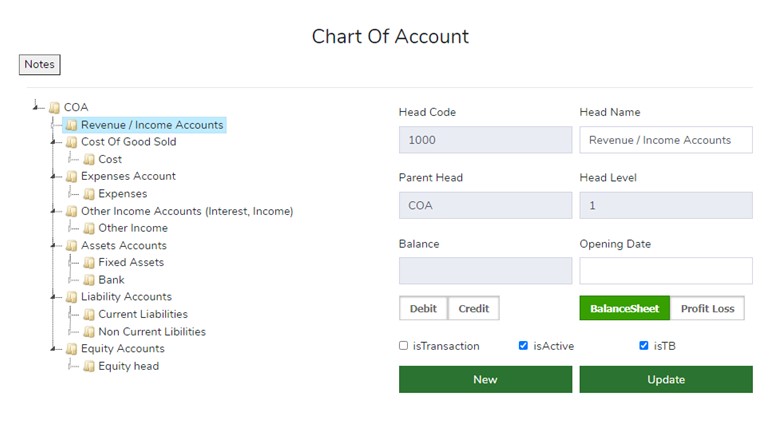
For each of them, the following details will need to be provided:
- Head Code
- Head Name
- Parent Head
- Head Level
- Balance (Debit or Credit)
- Opening Date
- Balance Sheet / Profit Loss
- isTransaction / isActive / isTB
You can either then make a new one or update the old one.
2a. Payment I Receipt – Finance Module – ERP Module – Trading ERP – Enterprise Resource Planning System
As you click on Payment I Receipt, it will take you to the Payment & Receipt Vouchers where on the top right hand corner, you can click to create a Voucher. To create a Voucher, the following details need to be filled in:
- Selecting the Voucher Type – Payment or Receipt
- Select Head Account
- Voucher Date
- Voucher No.
- Account Two
- Account One
- Description
- Cheque No.
- Cheque Date
- No.
- Amount
After submitting these details, it will appear on the main page where you can view the details and download the voucher, or then have the option to edit it.

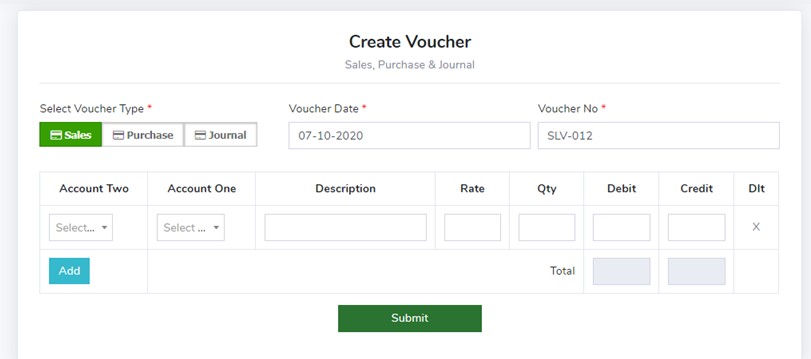
2b. Sale I Purchase I Journal – Finance Module – ERP Module – Trading ERP – Enterprise Resource Planning System
As you click on Sale I Purchase I Journal, it will take you to the Sales, Purchase & Journal Vouchers where on the top right hand corner, you can click to create a Voucher. To create a Voucher, the following details need to be filled in:
- Selecting the Voucher Type – Sales, Purchase or Journal
- Voucher Date
- Voucher No.
- Account Two
- Account One
- Description
- Rate
- Quantity
- Debit
- Credit
- You have the option to delete or add more
After submitting these details, it will appear on the main page where you can view the details and download the voucher, or then have the option to edit it.
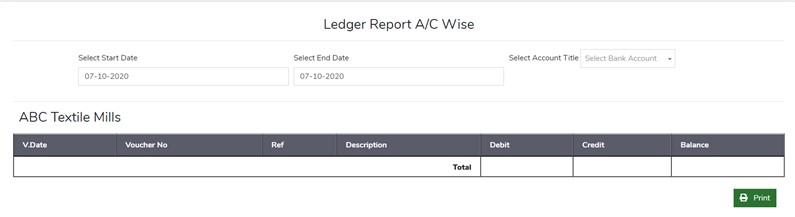
2c. Ledgers – Finance Module – ERP Module – Trading ERP – Enterprise Resource Planning System
As you click on Ledgers, it leads you to the Ledger Report A/C Wise. You select the start date, the end date and the account title. The report will then be revealed with the voucher date, number, ref, and description along with the debit, credit and balance. You then have the option to print this report.
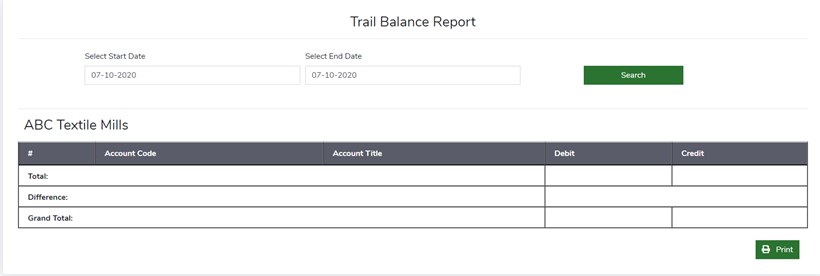
2d. Trial Balance – Finance Module – ERP Module – Trading ERP – Enterprise Resource Planning System
As you click on the Trial Balance, it will lead to the Trial Balance Report where you search by selecting the start date and the end date. The details will then be listed which include the account code, the account title, debit and credit. You then have the option to print this report.
2e. Balance Sheet – Finance Module – ERP Module – Trading ERP – Enterprise Resource Planning System
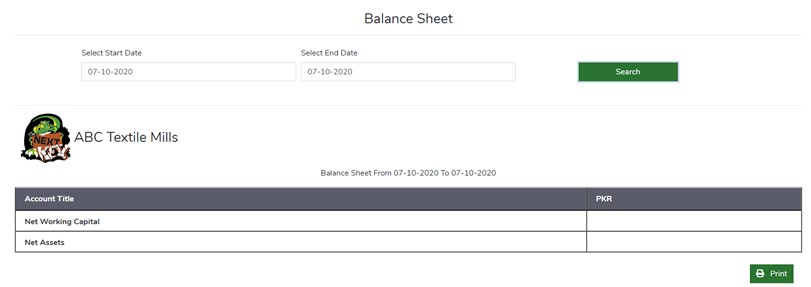
As you click on the Balance Sheet, it will lead to the Balance Sheet where you search by selecting the start date and the end date. The details will then be listed which include the account title (Net Working Capital, Net Assets), with the PKR. You then have the option to print this report.
2f. Profit & Loss – Finance Module – ERP Module – Trading ERP – Enterprise Resource Planning System
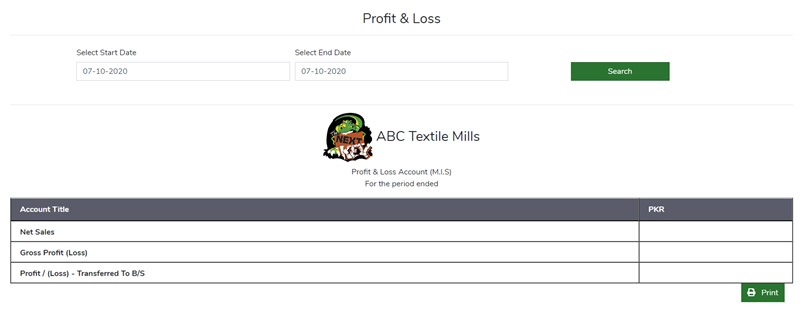
As you click on Profit & Loss, it will lead to the Profit & Loss where you search by selecting the start date and the end date. The details will then be listed which include the account title (Net Sales, Gross Profit (loss), Profit / loss – transferred to B/S), with the PKR. You then have the option to print this report.